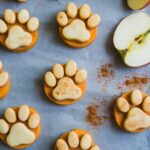
Apple & Peanut Butter Cookies: A Sweet and Savory Combo Your Dog Will Love
If your dog is as obsessed with apples and peanut butter as most humans are, these Apple & Peanut Butter Cookies are about to become a household favorite!
They’re loaded with fiber, a bit of protein, and just the right amount of natural sweetness, making them a wholesome treat that’s perfect for any occasion.
Plus, they’re super easy to make—you don’t need to be a pro baker to whip up something that’s healthy and delicious for your pup.
Ingredients: Healthy, Simple, and Dog-Approved
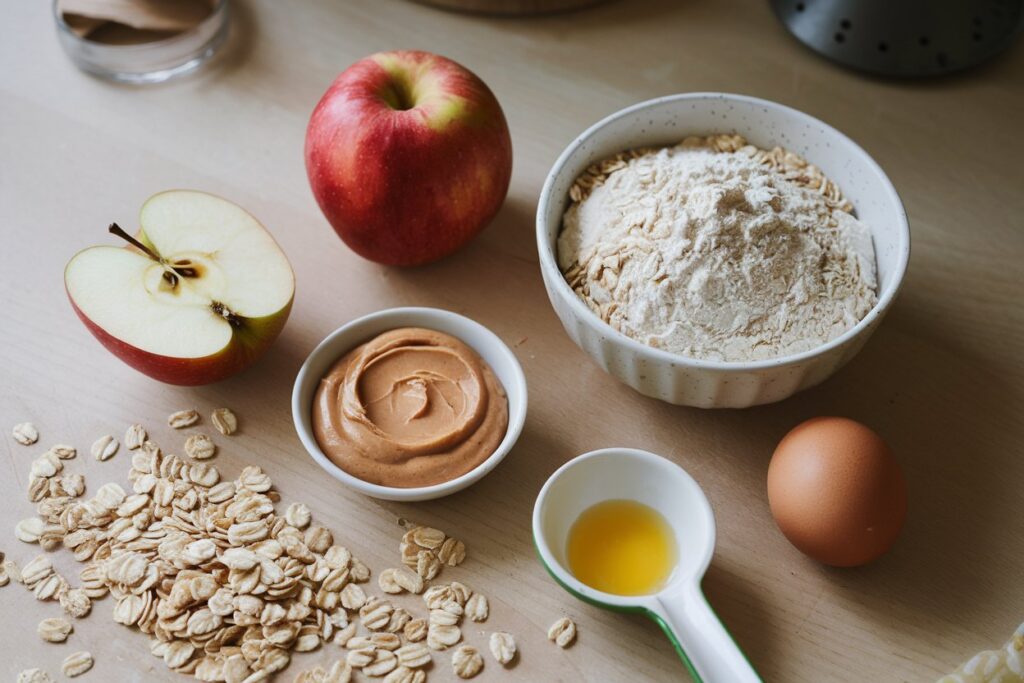
Let’s start with the essentials you’ll need to make these fruity, nutty cookies:
- 1 cup oat flour – Oat flour is a go-to for gentle digestion. It’s gluten-free and packed with fiber, making it great for dogs with sensitive stomachs.
- 1/2 cup grated apple (peeled and cored) – Apples add a little sweetness naturally, along with fiber and a boost of vitamin C.
- 1/4 cup natural peanut butter – Dogs love peanut butter, and it’s packed with protein and healthy fats. Just make sure it’s free from xylitol, which is harmful to dogs.
- 1 egg – Eggs act as a binder and add a bit of protein, helping the cookies hold together nicely.
- 1 tablespoon coconut oil (optional) – Adds a touch of healthy fat and keeps the cookies a bit softer (plus, it’s great for skin and coat health).
Instructions: Baking Apple & Peanut Butter Cookies in 6 Simple Steps
This recipe is straightforward and beginner-friendly, so don’t worry if baking isn’t usually your thing. Let’s get started!
Step 1: Preheat Your Oven
Start by preheating your oven to 350°F (175°C). Line a baking sheet with parchment paper—this keeps the cookies from sticking and makes cleanup a breeze.
Step 2: Prepare the Apple
Peel, core, and grate the apple. Be sure to remove any seeds, as apple seeds aren’t dog-friendly. Set the grated apple aside for now.
Step 3: Mix the Ingredients
In a large mixing bowl, combine the oat flour, grated apple, peanut butter, egg, and coconut oil if you’re using it. Stir until you have a thick, sticky dough that holds together. If it’s a bit too dry, add a splash of water to get the right consistency.
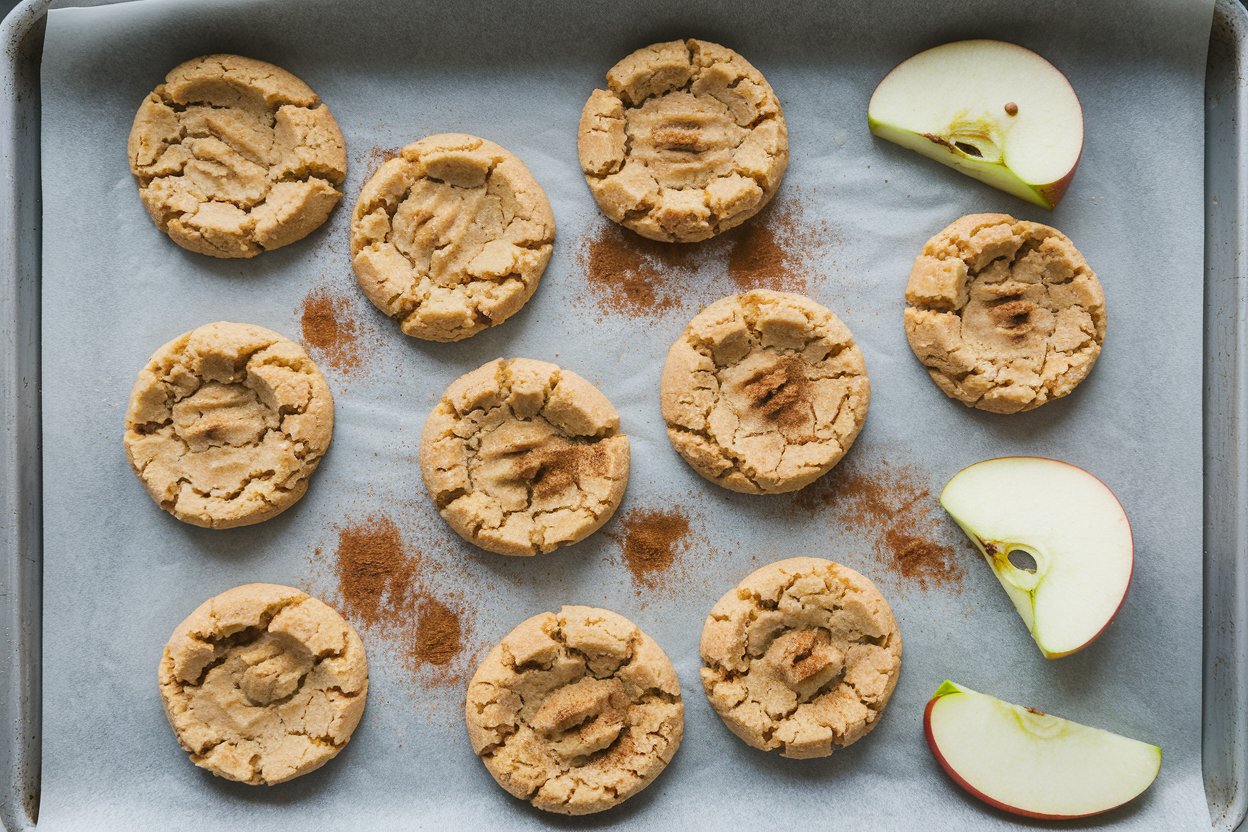
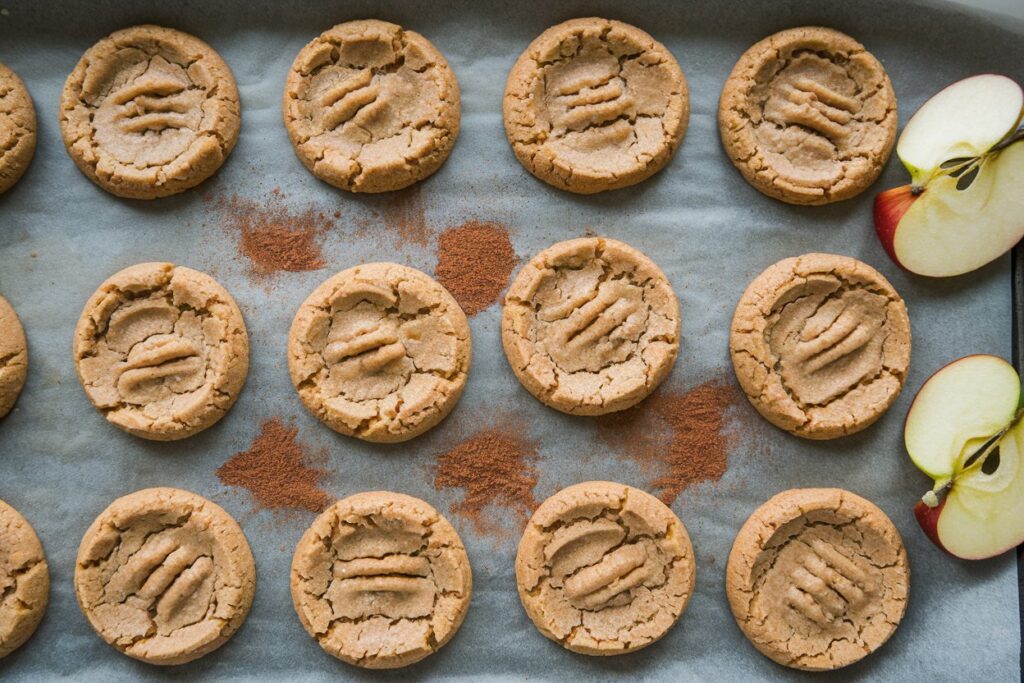
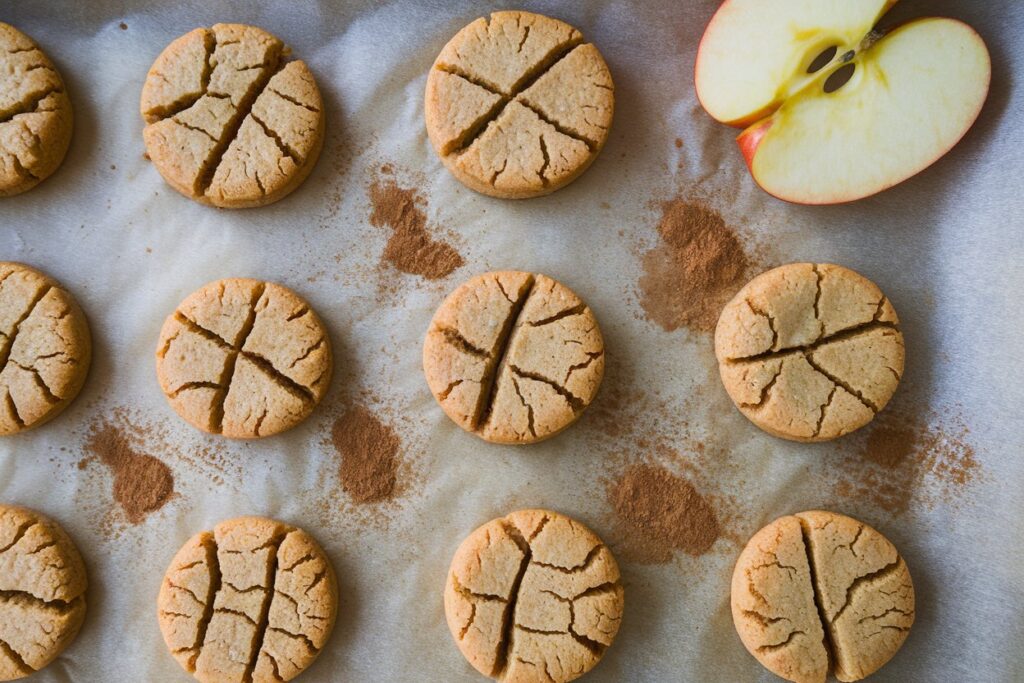
Step 4: Shape the Cookies
Take a spoonful of dough, roll it into a small ball, and flatten it slightly with your fingers or a fork to form a cookie shape. Place each cookie on the baking sheet, leaving a bit of space between them (although they won’t spread much).
Step 5: Bake
Bake the cookies for 15-20 minutes, or until they’re firm and golden. If your dog likes a crunchier texture, leave them in a few minutes longer or let them sit in the oven after you turn it off to dry out a bit more.
Step 6: Cool and Serve
Let the cookies cool completely before serving. By now, your dog will probably be giving you some serious puppy dog eyes, so be prepared for some excitement when they finally get a taste!
Why These Ingredients Are Great for Dogs
Here’s a quick breakdown of why these ingredients are perfect for your dog’s health:
- Oat Flour – Gentle on digestion and a good source of fiber, oat flour is ideal for dogs with sensitive stomachs.
- Apple – Adds a hint of natural sweetness and is packed with fiber and vitamin C.
- Peanut Butter – A favorite treat for dogs, peanut butter is full of protein and healthy fats (just make sure it’s xylitol-free).
- Egg – Acts as a natural binder and adds a bit of protein, helping keep the cookies together and adding nutrition.
- Coconut Oil – Adds moisture and healthy fat, which can support skin and coat health.
My Advice on Storing
Let’s talk storage! I always make a big batch of these cookies because they store so well. Here’s what I recommend for keeping them fresh and ready to serve:


In the Fridge
If you plan on using these cookies within a week, keep them in the fridge. An airtight container works best to retain their freshness. They’ll stay moist and ready to grab when your dog is looking for a little snack. Plus, storing them in the fridge keeps the peanut butter from getting too soft, which helps maintain their shape and texture.
In the Freezer
Want to make a big batch and save some for later? The freezer is your best friend here! These cookies freeze beautifully. Once they’re completely cooled, pop them in a freezer-safe bag or container. I like to separate layers with a bit of parchment paper so they don’t stick together.
When you’re ready to serve, just pull out a few cookies and let them thaw for a few minutes. They’ll be as tasty as when you first made them, and your dog will love the treat. These cookies will stay fresh for up to 3 months in the freezer, so you’ll always have a stash on hand!
Serving Ideas: Perfect for Any Time of Day
These Apple & Peanut Butter Cookies are versatile and make an ideal treat for just about any occasion. Here’s how you can use them to spoil your pup:
- Training Rewards – Break them into small pieces to keep your dog motivated and focused during training sessions.
- Snack Time – Serve a cookie as a mid-day snack or a post-walk reward.
- Meal Topper – Crumble a cookie over your dog’s food for a little extra flavor and nutrition.
FAQs
Q: Can I use a different flour?
Yes! Rice flour, coconut flour, or even whole wheat flour can be good alternatives if you don’t have oat flour on hand. Just keep an eye on the moisture levels, as different flours can absorb differently.
Q: What if my dog doesn’t like peanut butter?
Not all dogs are fans of peanut butter, believe it or not! You can substitute with almond butter or sunflower seed butter, just make sure it’s unsweetened and free of xylitol or added salt.
Q: Are these cookies safe for puppies?
Yes, these cookies are puppy-safe! Just introduce them gradually and keep portions small since puppies have smaller stomachs and can be sensitive to new treats.
Q: How many treats should I give my dog per day?
I usually stick to one or two cookies for larger dogs, while smaller dogs might only need half or one. It’s a treat, so it’s best to keep it at about 10% of their daily calories to avoid overfeeding.
Q: How can I make these cookies crunchier?
For a crunchier cookie, bake a bit longer or leave them in the oven as it cools to dry out further. Crunchy treats are great for dogs who like a bit of texture!
Q: Can I use fresh apples instead of grated?
Absolutely! You can dice the apples into small pieces, but make sure to remove any seeds and core. The grated texture does help the dough hold together, so diced apples might make the cookies a bit chunkier.
Q: Can I add a little something extra?
Sure! A pinch of cinnamon or a dash of turmeric can add extra flavor and even some health benefits, but keep it light to avoid overwhelming your dog’s stomach.
Final Thoughts
These Apple & Peanut Butter Cookies are a perfect blend of sweet and nutty, with a texture that’s soft but holds together nicely. They’re an easy, healthy way to treat your dog, whether it’s for training, a snack, or just because they’ve been especially good!
Give them a try, and watch your dog’s excitement go through the roof. Just be prepared—they may be hanging out in the kitchen a lot more, hoping for another batch!
Printable Recipe Card
Want just the essential recipe details without scrolling through the article? Get our printable recipe card with just the ingredients and instructions.

I’ve spent 10+ years in dog training, digging into what makes dogs (and their humans) tick. At Smart Dog Learning, I share my no-nonsense, fun approach to training so you can enjoy life with a well-behaved, happy pup—no boring lectures, just practical results 😉