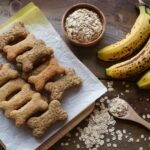
Peanut Butter Square Dog Treats: Easy, No-Mess Homemade Snacks
Peanut butter dog treats are a home-baking staple for a reason. They’re easy, smell great, and most dogs go wild for them. These square treats are simple to make and even simpler to handle—no rolling, no cookie cutters, and no sticky cleanup.
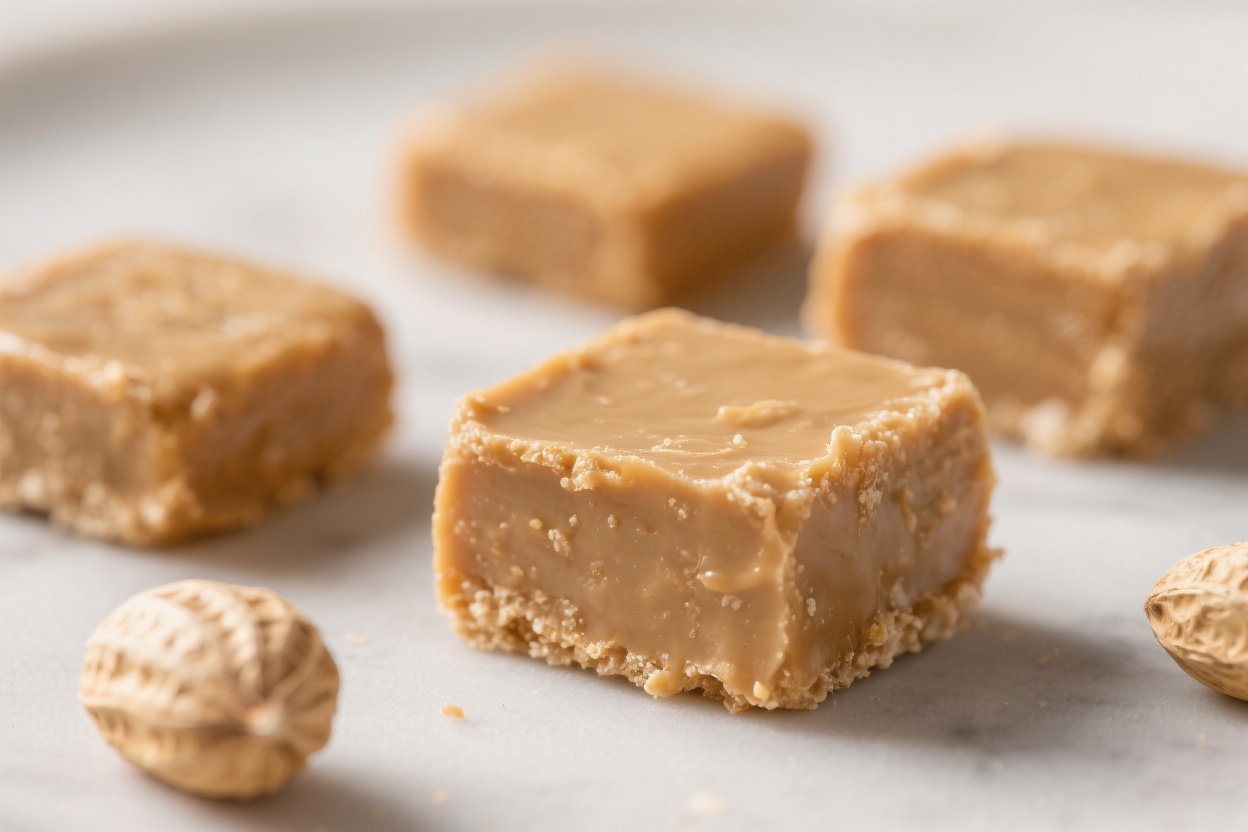
You press the dough into a pan, bake, and slice into neat squares. It’s the kind of recipe you’ll want to keep on repeat for training, daily snacks, or sharing with pup friends.
What Makes This Recipe So Good
- No-mess method: Press the dough into one pan and cut squares after baking. No flour-dusted counters or fussy shapes.
- Simple ingredients: Pantry staples like peanut butter, oats, and eggs come together quickly.
No special trips needed.
- Dog-friendly flavors: Natural peanut butter and a hint of applesauce or banana make these treats irresistible.
- Customizable: Adjust thickness, size, or texture to suit your dog’s chew preferences and training needs.
- Budget-friendly: A single batch makes plenty of treats for far less than store-bought options.
Shopping List
- Natural peanut butter (unsweetened, unsalted, no xylitol)
- Old-fashioned rolled oats (or quick oats)
- Whole wheat flour (or oat flour for a wheat-free option)
- Unsweetened applesauce or mashed ripe banana
- Eggs
- Water (as needed for consistency)
- Ground cinnamon (optional, for aroma and flavor)
Step-by-Step Instructions
- Preheat and prepare the pan: Heat the oven to 325°F (165°C). Line an 8×8-inch or 9×9-inch baking pan with parchment paper, leaving overhang for easy lifting. Lightly spray or grease the parchment to prevent sticking.
- Mix the wet ingredients: In a medium bowl, whisk together 1/2 cup natural peanut butter, 1/2 cup unsweetened applesauce (or 1/2 cup mashed banana), and 1 large egg until smooth and creamy.
- Combine the dry ingredients: In a separate bowl, stir 1 cup whole wheat flour, 1 cup rolled oats, and 1/2 teaspoon ground cinnamon (optional).
Break up any clumps.
- Bring the dough together: Add the dry mixture to the wet ingredients. Stir with a sturdy spoon until a thick dough forms. If it’s crumbly, add 1–3 tablespoons of water, a little at a time, until it holds together like soft cookie dough.
- Press into the pan: Transfer the dough to the prepared pan.
Use damp hands or the back of a spatula to press it into an even layer, reaching all corners. Aim for a uniform thickness so the treats bake evenly.
- Score for easy slicing (optional): Use a butter knife to lightly score the surface into small squares—about 1-inch for regular treats or 1/2-inch for training bites. This helps guide your cuts after baking.
- Bake: Place the pan on the center rack and bake for 22–28 minutes, depending on thickness and pan size, until the top looks set and the edges turn lightly golden.
For crisper treats, add 3–5 extra minutes.
- Cool completely: Lift the slab out by the parchment and set it on a wire rack. Let it cool fully; this helps the treats firm up and cut cleanly.
- Slice into squares: Use a sharp knife or pizza cutter to cut along your score lines. For extra-crunchy treats, return the sliced squares to a low oven (250°F/120°C) for 15–20 minutes to dry further.
- Serve and store: Offer a small piece to your dog to test.
Store the rest following the directions below.
Storage Instructions
- Room temperature: Keep in an airtight container for up to 3 days if the treats are on the softer side. If you baked them very dry, they can last 5–7 days.
- Refrigerator: Store in a sealed container for 7–10 days. Add a paper towel to absorb moisture and retain texture.
- Freezer: Freeze for up to 3 months.
Separate layers with parchment or freeze on a sheet pan first, then bag. Thaw individual squares at room temp for 10–15 minutes or in the fridge overnight.
Benefits of This Recipe
- Clean-cut squares: Easy portioning for training or quick rewards, without crumbs all over the floor.
- Whole ingredients: You control the peanut butter, avoid sweeteners like xylitol, and skip fillers found in some store treats.
- Flexible texture: Bake shorter for soft chews or longer for crunchy bites, depending on your dog’s preferences and dental needs.
- Economical and scalable: Double the recipe in a 9×13-inch pan for batch prep or gifts.
- Digestible options: Oats and applesauce are generally gentle on many dogs’ stomachs, and wheat-free swaps are easy if needed.
Common Mistakes to Avoid
- Using peanut butter with xylitol: Always read the label. Xylitol is extremely dangerous for dogs.
Choose unsweetened, unsalted peanut butter.
- Overbaking too soon: Start with the lower bake time. You can always add a few minutes or dry the cut squares later for extra crunch.
- Skipping the cool time: Cutting before fully cooled leads to crumbles and uneven pieces.
- Making treats too big: Smaller squares help with portion control and training. Big pieces can add unnecessary calories.
- Ignoring allergies or sensitivities: If your dog has wheat or peanut issues, use the alternatives below.
Alternatives
- Flour swap: Use oat flour or a certified gluten-free blend instead of whole wheat flour.
If using coconut flour, add extra moisture and egg since it absorbs more liquid.
- Peanut-free: Try unsalted sunflower seed butter or plain pumpkin puree. Note the color may darken with sunflower seed butter due to natural reactions during baking.
- Fruit base: Replace applesauce with mashed banana or pumpkin puree for a different flavor and aroma.
- Add-ins: Stir in 1–2 tablespoons of finely chopped parsley (fresh breath), unsweetened shredded coconut, or small carrot shreds. Keep add-ins minimal so the dough holds together.
- Soft-bake option: Spread slightly thicker and bake on the shorter end for senior dogs or those with sensitive teeth.
FAQ
Can I use crunchy peanut butter?
Yes, crunchy peanut butter works.
It adds texture, but make sure there are no added sugars, salts, or sweeteners, and absolutely no xylitol.
How many treats can my dog have each day?
Treats should be no more than about 10% of your dog’s daily calories. For most medium dogs, 1–3 small squares per day is reasonable. Adjust size and frequency based on your dog’s weight, activity level, and other treats.
Do I have to use eggs?
No.
For egg-free treats, replace the egg with 2 tablespoons of additional applesauce or pumpkin puree. The texture will be a bit denser but still holds well.
How do I make them extra crunchy?
Bake until the edges are golden, cool, cut into squares, then dry them in a 250°F (120°C) oven for 15–30 minutes, flipping halfway. The longer they dry, the crisper they become.
Are these safe for puppies?
Generally, yes, in tiny portions and assuming no allergies.
Introduce new foods slowly and consult your vet if your puppy has dietary restrictions or a sensitive stomach.
Can I add honey or sugar?
It’s best not to. Dogs don’t need added sugar, and many already find applesauce or banana sweet enough. Keep the ingredient list simple and dog-focused.
What if my dough is sticky?
Lightly wet your hands or spatula to press it into the pan.
If it’s overly wet, sprinkle in a little more flour or oats until it becomes workable.
Can I air-fry these?
Yes, if your air fryer has a baking insert. Press the dough into a parchment-lined insert and cook at 300–315°F (150–160°C), checking at 10 minutes. Times vary by model, so watch closely to avoid overbrowning.
Final Thoughts
These peanut butter square dog treats are simple, tidy, and budget-friendly—everything you want in a homemade snack.
With just a few pantry ingredients, you can make a batch that slices cleanly and stores well all week. Keep the sizes small, adjust the bake for your dog’s ideal texture, and label your peanut butter to ensure it’s dog safe. Once you try the press-and-bake method, you’ll wonder why you ever rolled dough for dog treats in the first place.
Printable Recipe Card
Want just the essential recipe details without scrolling through the article? Get our printable recipe card with just the ingredients and instructions.

I’ve spent 10+ years in dog training, digging into what makes dogs (and their humans) tick. At Smart Dog Learning, I share my no-nonsense, fun approach to training so you can enjoy life with a well-behaved, happy pup—no boring lectures, just practical results 😉