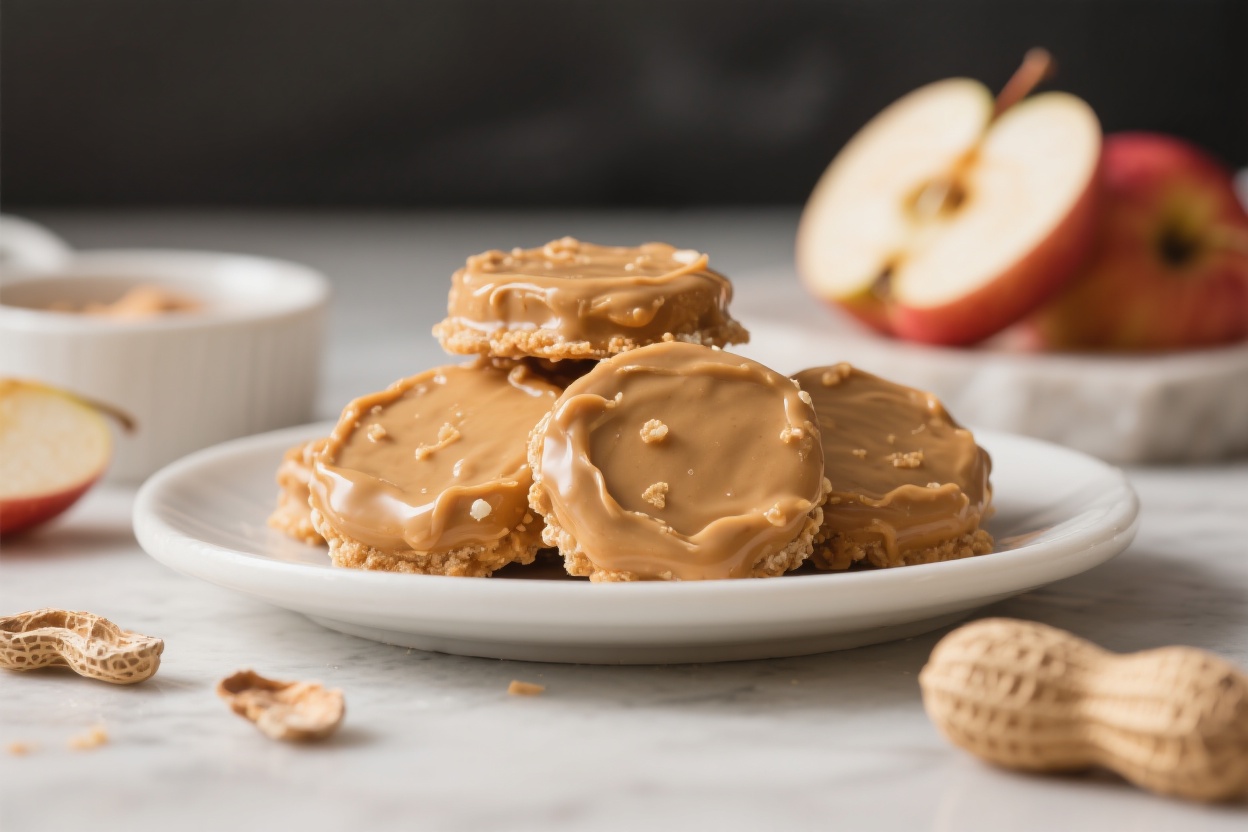
Peanut Butter & Apple Dog Treats: Naturally Sweet & Safe – A Simple Homemade Snack
Peanut butter and apples are a classic combo, and your dog will love them as much as you do. These treats are easy to make, budget-friendly, and use simple ingredients you already know and trust. No artificial flavors, no mystery additives—just clean, dog-safe goodness.
If your pup loves a crunchy bite with a hint of natural sweetness, this recipe is a winner. Plus, you’ll feel great knowing exactly what’s in every treat.
What Makes This Recipe So Good
- Dog-safe ingredients only: We use unsweetened applesauce, fresh apple, and natural peanut butter made without xylitol or added sugar.
- Easy to make: No fancy tools needed. Just mix, roll, cut, and bake.
- Customizable texture: Bake a little longer for crunchy treats or keep them softer for sensitive teeth.
- Budget-friendly: Everyday pantry items turn into delicious, healthy snacks.
- Smells great: Your kitchen will smell like warm peanut butter cookies—and your dog will be at your feet waiting.
What You’ll Need
- 1 3/4 cups whole wheat flour (or oat flour for a wheat-free option)
- 1/2 cup unsweetened applesauce
- 1/3 cup natural peanut butter (no xylitol, no added sugar)
- 1 small apple, finely grated or minced (peeled if your dog has a sensitive tummy)
- 1 large egg (for binding)
- 1/2 tsp ground cinnamon (optional; skip if your vet advises)
- 1–2 tbsp water, if needed for consistency
- Extra flour for dusting the counter
Step-by-Step Instructions
- Preheat the oven: Set to 350°F (175°C).
Line a baking sheet with parchment paper.
- Mix the wet ingredients: In a bowl, whisk the egg, peanut butter, and applesauce until smooth and creamy.
- Add the apple: Stir in the grated apple. If it’s very juicy, lightly squeeze out excess liquid first.
- Combine the dry: Add flour (and cinnamon if using). Stir until a dough forms.
If the dough is dry, add water 1 tablespoon at a time. If it’s sticky, add a little more flour.
- Knead and roll: Turn the dough onto a lightly floured surface. Knead a few times, then roll to about 1/4 inch thickness.
- Cut shapes: Use a cookie cutter or slice into small squares.
Aim for bite-size pieces for easier portioning.
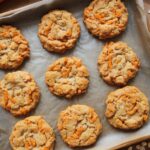
- Bake: Place on the prepared sheet and bake for 18–22 minutes, until firm and lightly golden on the edges.
- For crunchier treats: Turn off the oven and let the treats sit inside for 10–15 more minutes to dry out.
- Cool completely: Let treats cool on a rack before offering them to your dog.
How to Store
- Room temperature: Keep in an airtight container for up to 4–5 days if baked fully dry.
- Refrigerator: Store for up to 10–12 days. This is best for softer treats.
- Freezer: Freeze for up to 3 months. Thaw a few at a time in the fridge or on the counter.
- Moisture matters: Make sure treats are completely cool and dry before storing to prevent mold.
Why This is Good for You
- Clean ingredients: You control the quality—no preservatives, artificial colors, or fillers.
- Balanced snack: Peanut butter adds healthy fats and protein, while apples bring fiber and natural sweetness.
- Supports training: Small, tasty treats are great motivators.
Cut them small to keep calories in check.
- Allergy-friendly options: Easy to swap flours or adjust texture to suit your dog’s needs.
Common Mistakes to Avoid
- Using the wrong peanut butter: Avoid any brand with xylitol, sugar substitutes, or added sugar. Check the label every time.
- Too much moisture: Juicy apples can make the dough sticky. Lightly squeeze grated apple or add more flour if needed.
- Overbaking: Dry is good, burnt is not.
Watch the edges and reduce time if your oven runs hot.
- Oversized treats: Large pieces can mean too many calories. Keep them bite-sized, especially for small dogs.
- Ignoring sensitivities: If your dog has wheat or egg sensitivities, use the swaps below and consult your vet if unsure.
Variations You Can Try
- Wheat-free: Use oat flour or a certified gluten-free flour blend. You may need a touch more applesauce for binding.
- No egg: Replace the egg with 2 tablespoons of unsweetened applesauce or a flax egg (1 tbsp ground flax + 3 tbsp water, rested 5 minutes).
- Extra crunch: Add 1–2 tablespoons of rolled oats to the dough and bake until fully dry.
- Pumpkin twist: Swap half the applesauce with plain canned pumpkin for a fall flavor.
- Smaller training bites: Roll the dough thinner and cut into tiny squares; reduce bake time slightly.
FAQ
Is peanut butter safe for dogs?
Yes, as long as it’s natural and xylitol-free.
Xylitol is extremely toxic to dogs. Choose peanut butter with only peanuts (and maybe salt). Avoid added sugars and artificial sweeteners.
Can I use almond butter instead?
In small amounts, plain almond butter without xylitol is generally safe for most dogs, but it can be richer and may upset sensitive stomachs.
Peanut butter is the more dog-friendly choice for this recipe.
Do I need to peel the apple?
Not necessarily. The peel has fiber and nutrients. If your dog has a sensitive stomach or you prefer a smoother texture, peeling is fine.
How many treats can I give my dog per day?
Treats should make up no more than 10% of your dog’s daily calories.
For small dogs, 1–2 small treats is often enough; medium dogs 2–4; large dogs 3–6, depending on size and activity level.
Can I make these softer for senior dogs?
Yes. Roll the dough slightly thicker and bake for less time, just until set. Store in the fridge and use within a week.
What if my dough is too sticky?
Sprinkle in more flour a tablespoon at a time, or lightly squeeze moisture from the grated apple.
Dust your rolling pin and surface well.
Can I use apple chunks instead of grated apple?
Finely minced pieces work, but keep them small so the treats hold together. Larger chunks can cause cracks and uneven baking.
How do I know they’re fully baked?
The edges should look dry and lightly golden. The center should feel firm, not doughy.
For longer shelf life, let them sit in the turned-off oven to dry out more.
Wrapping Up
Homemade Peanut Butter & Apple Dog Treats are simple, safe, and genuinely tasty for your pup. With a handful of pantry staples, you can bake a batch that feels special and keeps well. Tweak the texture, size, and flour to suit your dog, and always double-check that peanut butter label.
Your dog gets a wholesome snack, and you get the peace of mind that comes with making it yourself. That’s a win for both of you.
Printable Recipe Card
Want just the essential recipe details without scrolling through the article? Get our printable recipe card with just the ingredients and instructions.

I’ve spent 10+ years in dog training, digging into what makes dogs (and their humans) tick. At Smart Dog Learning, I share my no-nonsense, fun approach to training so you can enjoy life with a well-behaved, happy pup—no boring lectures, just practical results 😉