The Ultimate Guide To Cleaning Dirty Grout Lines
Dirty grout lines make even clean floors look… not clean. The good news? You don’t need a pro or fancy gadgets to fix them.
With a few smart moves and the right supplies, you’ll turn grimy grout into “wow, did you redo your floors?” status. Ready to banish the dingy gray? Let’s go.
First, figure out what you’re dealing with
Grout isn’t one-size-fits-all, and your approach shouldn’t be either.
You’ve got two main types: sanded (wider joints, more common on floors) and unsanded (narrow joints, often on walls and shower surrounds). This matters because the wrong cleaner or tool can damage the surface. Quick checks:
- Color: Light grout shows stains and mold more. Dark grout hides grime but still needs love.
- Sealant: If water beads on the grout, it’s sealed.
If it absorbs quickly, it’s not. Unsealed grout stains faster.
- Location: Kitchen grout gets grease. Bathroom grout battles soap scum and mildew.
Tailor your cleaner accordingly.
Gather your cleaning arsenal
You don’t need to empty a hardware store. You just need the right basics.
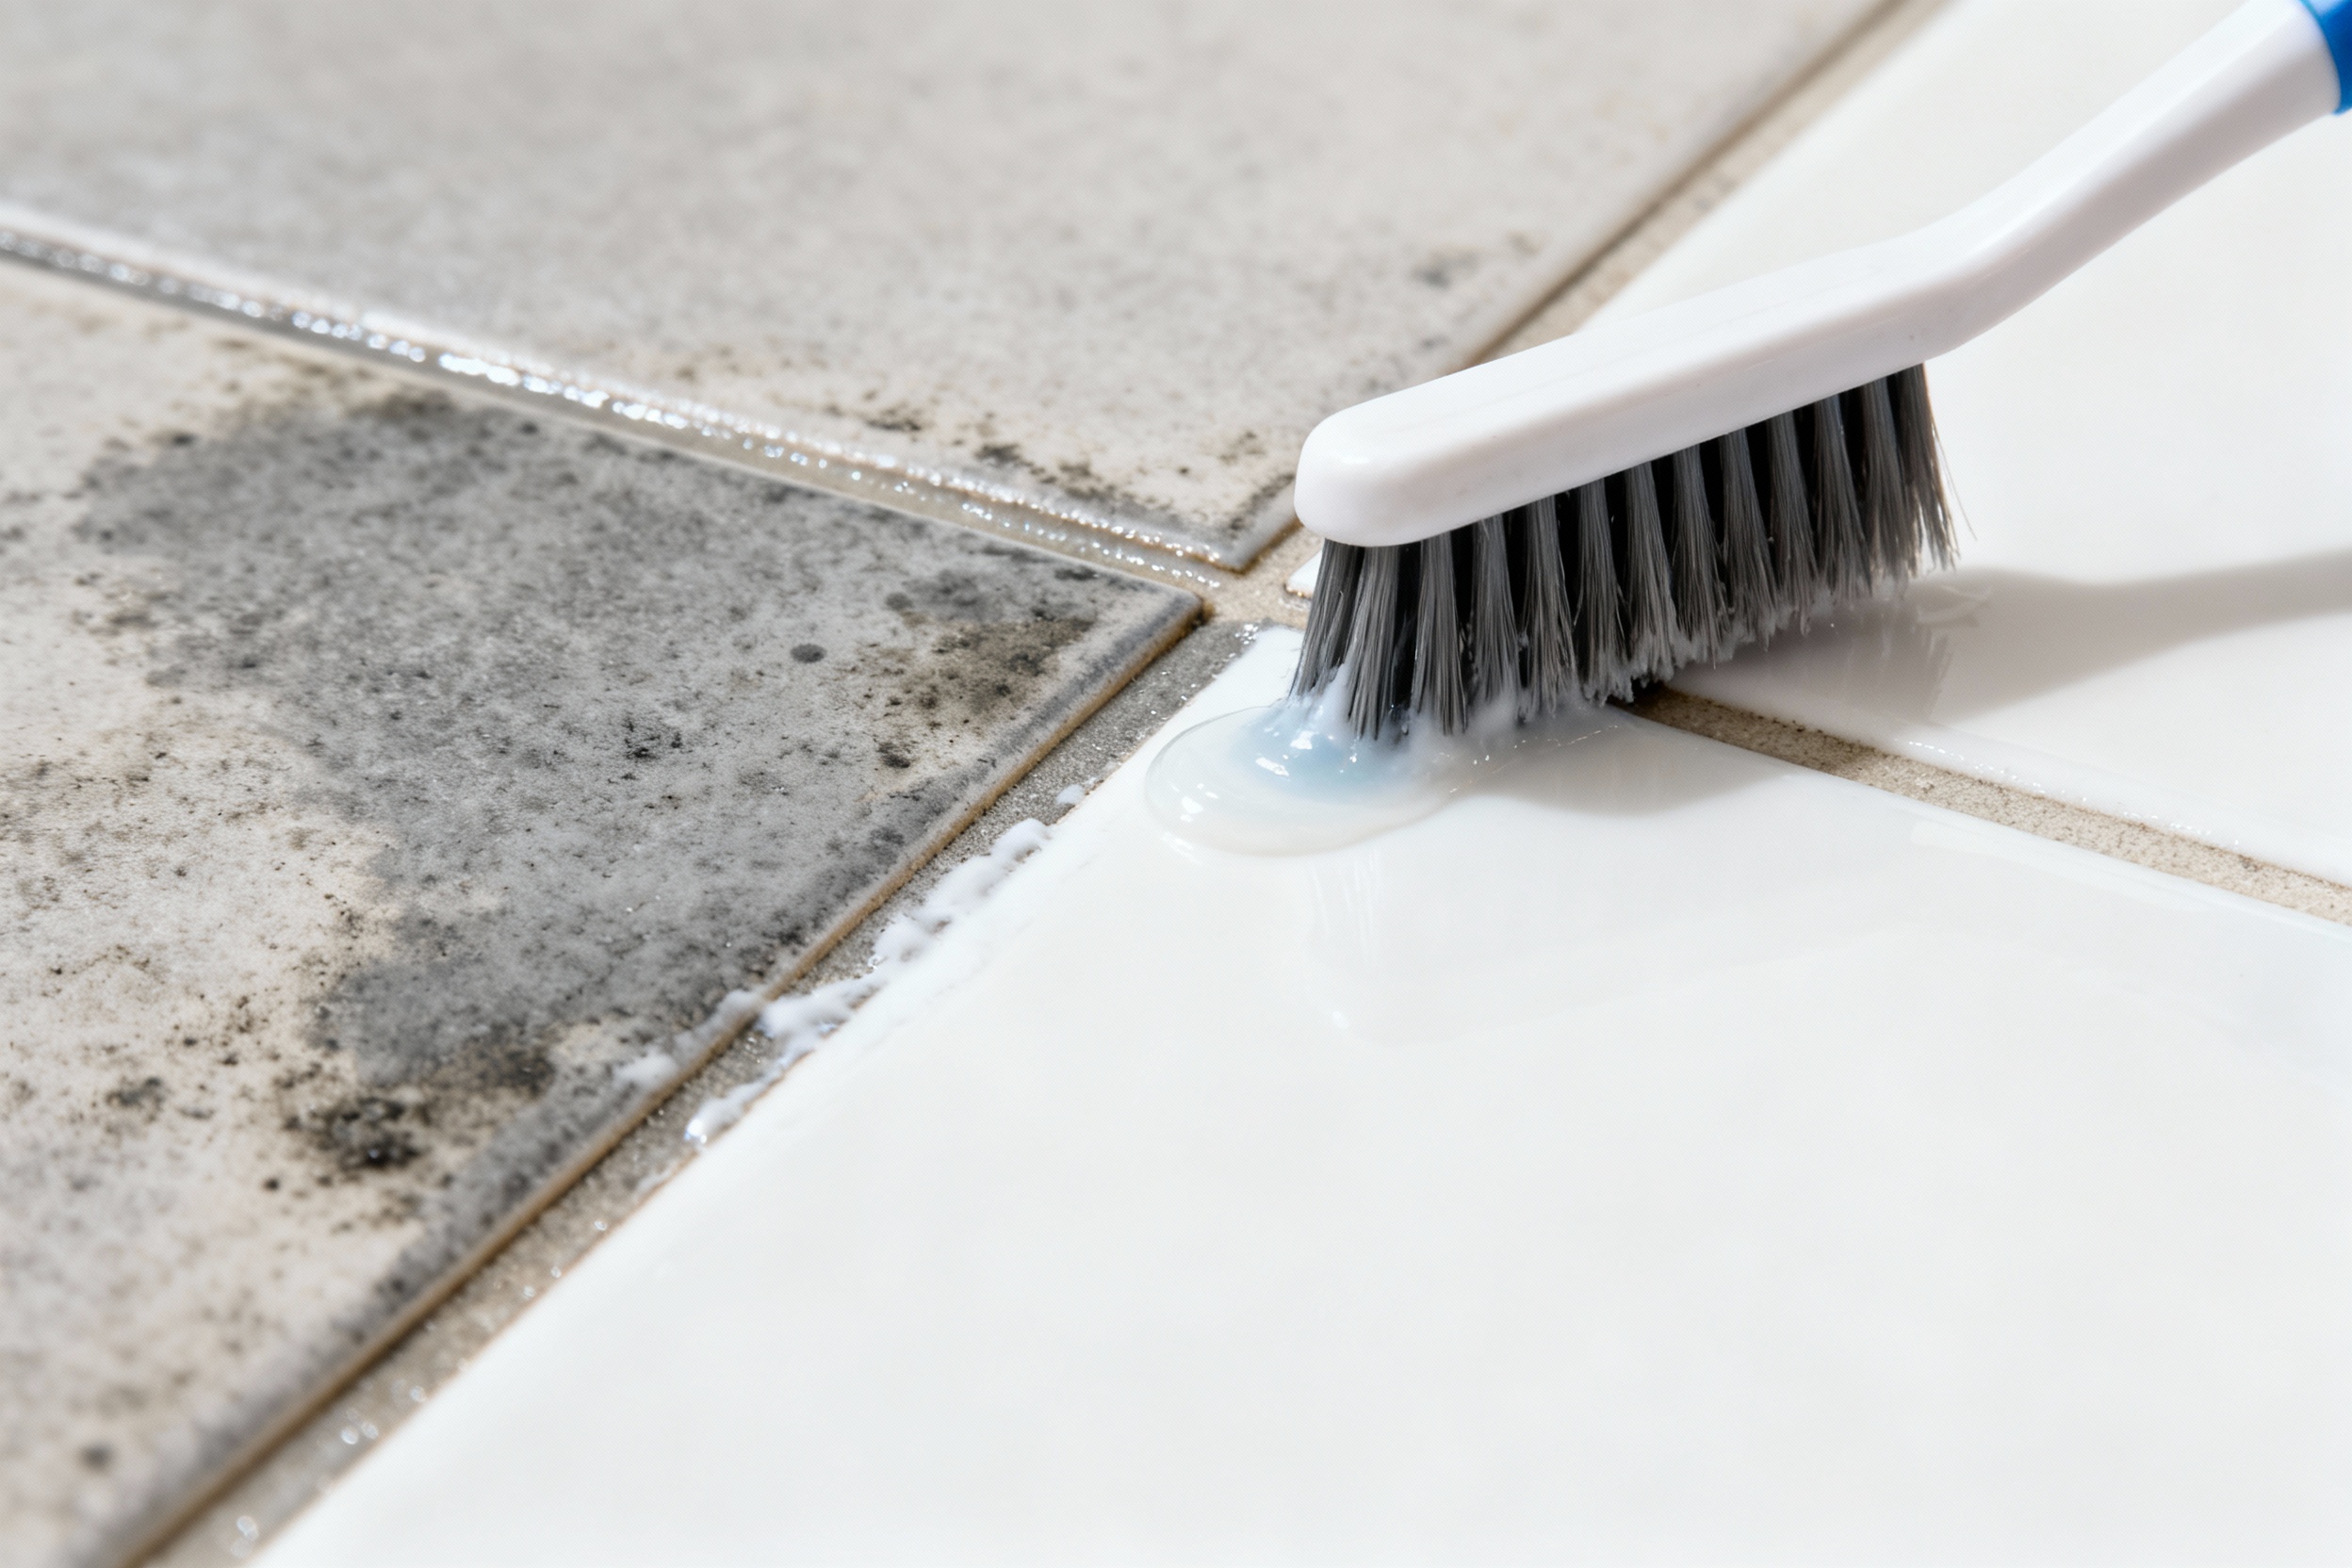
- Soft to medium bristle brush: A dedicated grout brush works best. An old toothbrush works in a pinch.
- Microfiber cloths or towels: For wiping and drying.
- Spray bottle: For mixing and applying cleaners.
- Baking soda + hydrogen peroxide: The classic duo for grimy, light-colored grout.
- White vinegar: Great for soap scum and mineral deposits—not on natural stone, FYI.
- Oxygen bleach (sodium percarbonate): Color-safe and powerful for deep stains.
- Alkaline degreaser: For kitchens where grease has made itself at home.
- Steam cleaner (optional): Fantastic for sanitizing and loosening gunk without chemicals.
- Sealer: Penetrating grout sealer for the win after you clean.
Your simple step-by-step cleaning plan
Let’s keep it easy and effective.
IMO, this routine gives you the best bang for your elbow grease.
- Vacuum or sweep first. Dirt turns into mud when wet. Remove loose debris so you don’t grind grit into grout.
- Pre-wet the grout. Lightly mist with warm water. Damp grout absorbs cleaner more evenly.
- Pick your cleaner:
- Light grime: 1:1 mix of water and white vinegar (skip if you have marble, travertine, or limestone).
- Stains on light grout: Make a paste with baking soda + hydrogen peroxide (about 2:1).
- Grease-heavy areas: Diluted alkaline degreaser per label.
- Deep clean: Oxygen bleach solution (mix per the manufacturer’s directions).
- Apply and let it sit. Give it 5–10 minutes to break down dirt.
Don’t let it dry out—mist if needed.
- Scrub smart, not hard. Use short strokes along the grout line. Work in small sections so you don’t get overwhelmed.
- Rinse thoroughly. Wipe with clean water and a microfiber cloth. Residue invites new dirt like a magnet.
- Dry completely. Towel dry or let it air out with good ventilation.
Dry grout shows true results and prevents mildew.
When to bring out the steam
Steam cleaners shine in bathrooms and high-traffic floors. Use a narrow nozzle, move slowly, and follow with a dry towel. Steam lifts grime and kills bacteria without chemicals, which is great when you’re over the smell of cleaners, IMO.
Targeted fixes for common grout problems
Different mess, different strategy.
Pick your battle plan:
Soap scum and mineral deposits
Use the 1:1 vinegar-water spray and a nylon brush. For stubborn spots, sprinkle a little baking soda on the grout and spray the vinegar mix over it for a fizzy boost. Again, avoid vinegar on natural stone—use a pH-neutral cleaner instead.
Mold and mildew
Try hydrogen peroxide straight from the bottle.
Spray, let it sit 10 minutes, scrub, and rinse. It whitens without bleaching surfaces. If you must use chlorine bleach, dilute it well, ventilate the room, and never mix it with ammonia or vinegar.
Ever.
Grease and kitchen grime
Hit it with an alkaline degreaser. Let it dwell, then scrub and rinse thoroughly. Grease loves to cling, so a second rinse helps.
Deep stains on light grout
Make a baking soda + peroxide paste and lay it on thick.
Cover with plastic wrap to keep it moist for 30–60 minutes, then scrub and rinse. Oxygen bleach also works wonders and won’t wreck color.
What about sealed vs. unsealed grout?
Sealed grout cleans easier and stains less. Unsealed grout acts like a sponge.
If your grout soaks up water right away, put sealing on your to-do list after cleaning.
How to test for sealer
Drop a little water onto a few lines. If it beads, you’re good. If it darkens the grout within seconds, it’s thirsty.
How to seal like a pro (without the ego)
- Let grout dry fully after cleaning—24 hours is safe, 48 is safer.
- Use a penetrating sealer made for grout, not a topical shiny coating.
- Apply with a small brush, wheel applicator, or foam pad.
Wipe tile immediately to avoid haze.
- Do a second coat if the product recommends it.
- Test with a water drop again. It should bead and sit there looking bored.
Tools and techniques to avoid
I get the temptation to go nuclear, but you’ll regret some shortcuts.
- Wire brushes or metal scrapers: They gouge grout and leave it rough, which collects more dirt.
- Colored sponges that shed dye: They can stain light grout. Yep, that’s a thing.
- Acidic cleaners on natural stone: Marble, limestone, and travertine will etch.
Use pH-neutral only.
- High-pressure washers indoors: Unless you enjoy water under your tiles and loose grout.
- Mixing chemicals: Bleach + vinegar or ammonia creates toxic gas. Hard pass.
Make it last: easy maintenance habits
Want to clean less? Same.
These small habits keep grout from getting nasty again.
- Squeegee showers after use. Quick wipe-down = less water sitting in grout.
- Use a pH-neutral daily cleaner or just warm water on maintenance days.
- Vacuum or sweep floors before mopping. Dirt + mop water = muddy grout lines.
- Spot-treat spills fast. Coffee, wine, and grease don’t age gracefully.
- Re-seal high-traffic areas every 6–12 months.
It’s annoying, but it works.
Quick weekly routine (10 minutes, tops)
- Bathroom: Spray a light peroxide or pH-neutral cleaner, wait 2 minutes, wipe, and squeegee.
- Kitchen: Degrease problem zones near the stove and sink, then rinse.
- Floors: Vacuum, spot-scrub any darkening grout lines, damp mop. Done.
FAQ
Can I use bleach to whiten grout?
You can, but it isn’t always the best first move. Try hydrogen peroxide or oxygen bleach first because they’re gentler and still effective.
If you use chlorine bleach, dilute it, ventilate the room, and rinse well. And never use it on colored grout unless you like surprises.
Is a Magic Eraser safe for grout?
It can help on surface grime, but it’s mildly abrasive. Use it on the tile more than the grout, and avoid scrubbing aggressively on soft or old grout.
If in doubt, test a small spot first, FYI.
Why does my grout look clean when wet and dark again when dry?
That usually means staining inside the pores. Surface cleaning helps, but you may need an oxygen bleach soak or a peroxide paste dwell to pull stains out. If it still looks dingy, consider re-coloring grout with a color-seal product.
Will a steam cleaner damage grout?
Used properly, no.
Keep the nozzle moving, don’t focus heat for too long in one spot, and avoid cracked or loose grout until repaired. Steam plus a towel wipe leaves grout legitimately fresh.
How do I fix cracked or missing grout?
Clean out loose bits with a grout saw, vacuum the dust, and re-grout with a matching product. Let it cure per the bag (usually 24–72 hours), then seal.
If cracks return, movement or substrate issues might exist—time to call a pro, IMO.
Can I just paint my grout?
You can use a grout color sealer to change or refresh the color, and it also seals the pores. It looks great when you apply it neatly and wipe the tile promptly. Prep matters—clean thoroughly first or you’ll seal in grime.
Conclusion
Grout gets dirty because it’s porous, not because your cleaning skills failed.
Arm yourself with the right cleaner for the mess, give it time to work, scrub with the right brush, and rinse like you mean it. Seal after you win the battle, and future cleanings get way easier. Do that, and your floors and walls go from “ugh” to “oh hello, gorgeous.”

I’ve spent 10+ years in dog training, digging into what makes dogs (and their humans) tick. At Smart Dog Learning, I share my no-nonsense, fun approach to training so you can enjoy life with a well-behaved, happy pup—no boring lectures, just practical results 😉